from the Technology Interface

the Technology Interface / Winter98
Jeffrey S. Beasley
Department of Engineering Technology
New Mexico State University
This email tutorial has been developed to guide you through the
use of Netscape as an email manager. The term email is short
for electronic mail. Electronic mail is a technology available
in computer networks which facilitates the rapid exchange of information,
typically text, but it can also be expanded to include the exchange
of images and formatted documents such as that created by a word-processor.
This exercise will show you how to set-up Netscape as a mail manager,
and then send
and receive email messages. Not all of the features of the Netscape
mail manager will be explored. New versions of Netscape are always
being developed. The version you use at your school may vary
somewhat from the one demonstrated in this exercise but the basic
concepts should remain the same.
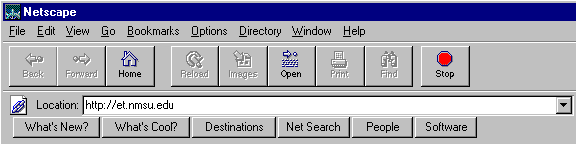
Start Netscape by either clicking on the Netscape Icon or selecting
it from your list of available programs. Your screen should look
similar to that shown in Fig. 1.
Before you can begin using Netscape as your mail manager, you
must specify some information regarding your email address and
your mail server. This information is usually provided by the
Network Systems Manager at your site. For this exercise, you
will be provided the needed information. To initialize the mail
manager, click on Mail and News Preferences from the Options
menu as shown in Fig. 2.

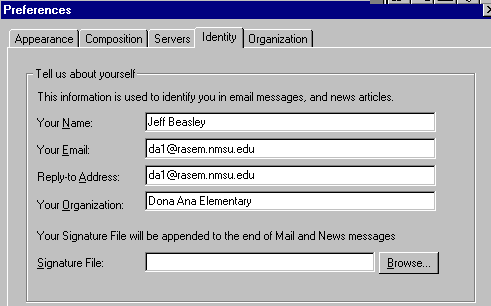
Select identity and you will get the menu shown in Fig. 3. Complete
the information in each space as directed. An example has been
provided. Typically your email address and the Reply-to-Address
are the same. The spaces for Your Name and Your Organization
are provided so that the header file in your email message is
easier to read.
Next, you must specify information concerning the mail server
you will be using. Select the Servers menu. You will
get a screen image similar to that shown in Fig. 4. Netscape
allows you to specify a different mail server for outgoing and
incoming mail. The outgoing mail server uses SMTP which
stands for Simple Mail Transfer Protocol.
This is a worldwide standard for transferring email messages.
The incoming mail uses POP3 which is a Post Office
Protocol version 3. This is an Internet standard
which moves your email message from your server to your computer.
An example of the information required to be placed in this menu
is shown in Fig. 4. Once again, this information will be provided
by your Network Systems Manager.
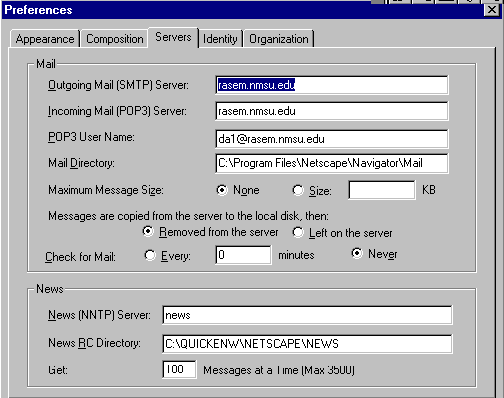
This menu provides you with options for setting the maximum message size and provides you with the option to leave the messages on the server or transfer them to your computer(local disk). You can also have your mail manger check for messages at regular time intervals if you leave your email manager running in the background. The NNTP is the Network News Transfer Protocol, typically associated with USENET articles which is a service for exchanging news information. Initializing your email manager is only required the first time you use the software or upgrade your system to a new version. Your Network System Manager can usually answer all your questions concerning what information must be provided in the blanks. Your Network Systems Manager will also be providing you with your email address. Press the OK button when you have entered the required information. You are now ready to begin using your Netscape email manager.
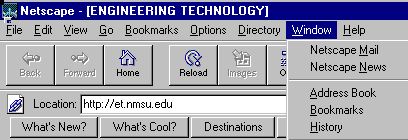
To enter the Netscape Mail option, place the cursor over the Window
menu and click the left mouse button. Your screen will look similar
to Fig. 5
Now you are ready to begin sending and receiving email messages
with your Netscape email manager. To reenter the email manager
click on Window/Netscape Mail as shown in Fig. 2. You
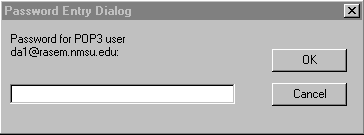
will get a new screen prompting you for your Password for your
POP3 user account as shown in Fig. 6. This information will be
provided by your Network Systems Manager. Enter your password
and click on OK.
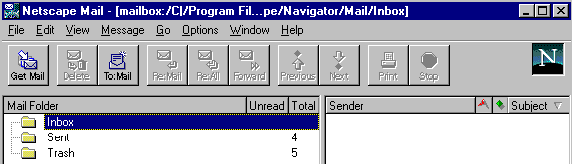
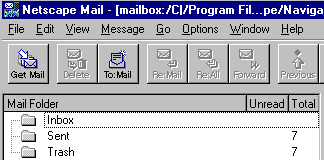
You will now get a screen similar to that shown in Fig. 7. The
cursor has been placed over the Inbox folder. The contents
of the Inbox folder will be shown on the right side. In this
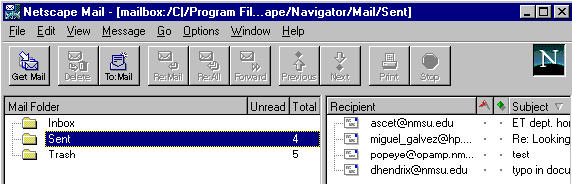
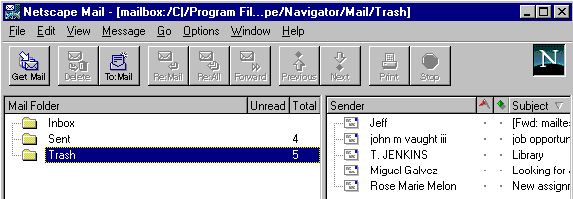
case, the Inbox folder is empty. Figures 8 and 9 show
the Sent and Trash folders highlighted. The Sent
folder keeps an electronic copy of email messages you send.
The Trash folder temporarily holds discarded email messages
until you wish to totally discard the contents. A general rule
of the thumb is to keep discarded email messages in the Trash
folder for about two months.
. 
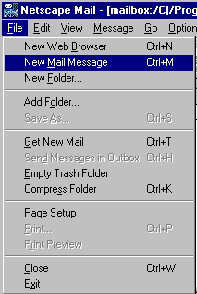
To send an email message, select File/New Mail Message as shown in Fig. 10.
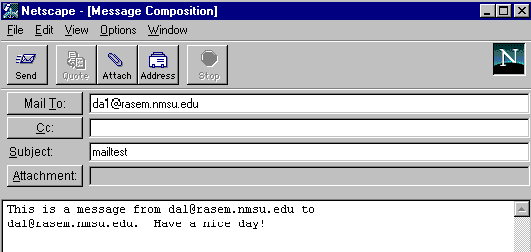
You will get the screen shown in Fig. 11. For this example, a
message has been prepared for da1@rasem.nmsu.edu. The subject
is mailtest. To enter this information, click on the space for
the entry. The Mail To: is the email address of the person
you wish to send a message. The CC: entry is optional
and provides an electronic carbon copy and is the email address
of the person or you wish to send a copy. The Subject: is
optional. Attachment: is a place where you can specify
how to email an attached file. Sometimes this is used to send
a copy of a graphics file or a document prepared by a word processor.
This is accessed by clicking on Attach/Attach File and
selecting the appropriate file as an attachment. It is important to
note that each server can have a limitation on email file size.
It is possible that attached files can create email message too large
for the server to handle. If this happens three possible conditions can
occur. The first is that the message will be rejected by the host server
and a message will be returned to you saying the server was unable
to deliver the message. Second, it is possible that your server
can handle the email file size but the remote server at the receive location
can't handle the file size. In this case, you will receive a message
that the server is unable to deliver the message. A third case is
that the server will automatically fragment the email message into manageable file
sizes. The person receiving the message will receive multiple messages
which have to be reconstructed using a package like UUDECODE which can
decode MIME (Multipurpose Internet Mail Extensions) back into the original
message. MIME is an Internet standard mail protocol which allows an email
message to incorporate multimedia features such as graphics, sound, and video.
After completing the header information, you are ready to enter
the email text in the blank box at the bottom of the screen. A simple message
has been prepared for this example. Your completed email message
should look similar to Fig. 11. Click on Send when you
are ready to mail your message. Your screen should return to
the Netscape Mail manager screen similar to Fig. 7.
To check to see if you have received an email message click on
Get Mail as shown in Fig. 12. Your mail manager
will check the contents of your POP3 server and will send you
a message if you have mail.
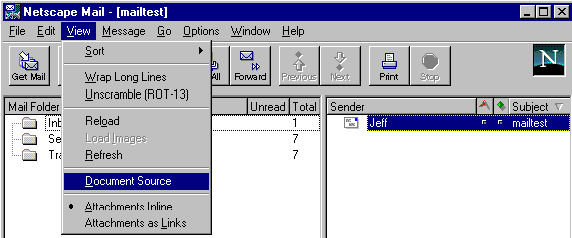
Click on Inbox and if you have received any email your
screen will show information similar to Fig. 13. For this example,
one message is waiting to be read on your Inbox. The
sender and subject information are shown on the right.
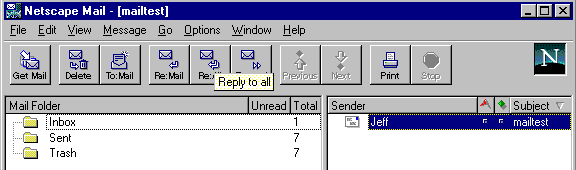
To view the message, double-click on the message you wish to view in
the Inbox. You may need to expand the size of your email screen so
that the message can directly be viewed in the window. You can also click on
View/Document Source as shown in Fig. 13.
The contents of the email message will be displayed on your screen as shown in Fig. 14
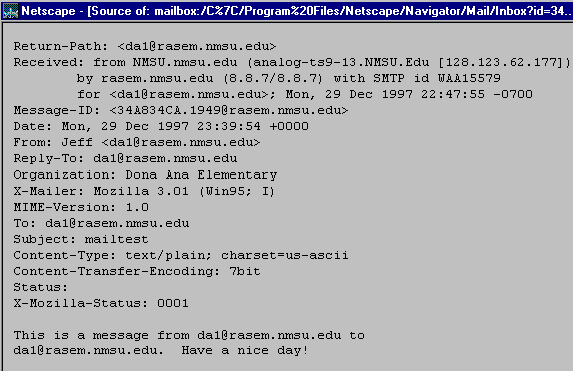
Email messages contain a lot of header information which describes
the sender and the electronic path the message took to get to
you. Normally you will not have to look at this information unless
there is a problem with your email. In that case, the Network
System Manager will need to view the contents of the header.
You can reply to a sender by clicking on the Reply button (Re:
Mail) and entering your information. The email address should
automatically appear on the Mail To: line. You can also Forward
a message to another email address by pressing the Forward
button and entering any required information.